Start
Your first chop
A fifteen-minute tutorial: load a drum loop, chop it, rearrange it, add a second track, mix and export.
In this tutorial you make a short beat from two samples. It takes about fifteen minutes.
You need Chop installed and making sound (Install and set up) and:
- a drum loop of one or two bars, no longer than 10 seconds, in WAV, AIFF, FLAC or MP3. Any loop will do. Knowing its tempo helps;
- a second sound: a bass note, a chord or a voice.
Start from an empty project: File > New Project.
1. Set the tempo
The green box with 120.0 in the toolbar is the BPM (in the pictures of this tutorial the loop is at 96 BPM, so it reads 96.0). If you know the tempo of your loop, double-click the box, type it and press Return.
Chop does not find the tempo of a sample by itself. If you do not know it, leave 120: you fix the loop's length in the next step.
2. Load the loop into track 1
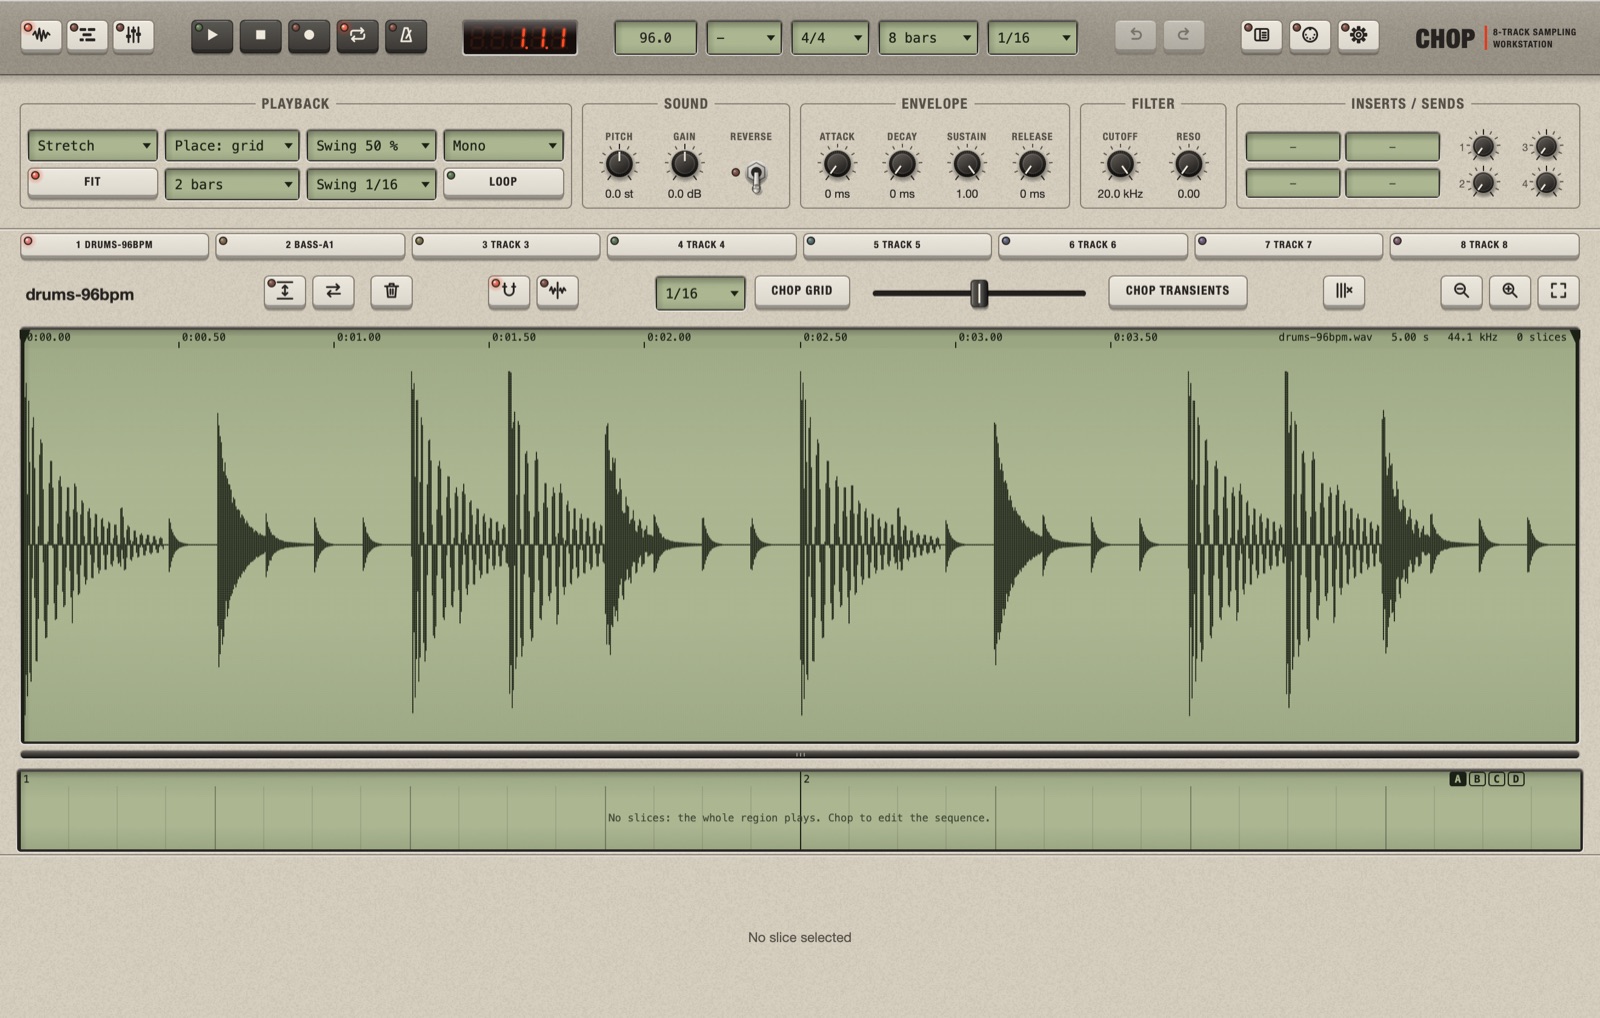
Chop opens on the Sample screen with track 1 selected. Drag the loop from the Finder onto the large green area in the middle.
The waveform appears and the tab of track 1 takes the file's name. Now look at the Playback group at the top left. The box that reads 2 bars (or another number) is Bars: the length Chop gave the loop.
- If the BPM matches the loop, Bars shows the loop's real length and you are done.
- If it does not, the loop does not fill its bars: it ends before the last bar does, and Bars may show a bar too many. Click the Bars box and choose the length the loop should have (for example 2 bars). Click it again and choose the first item, Fit sample to 2 bars. The loop is stretched to exactly that length, without changing its pitch.
Press Return. The loop plays over and over, in time. Press Return again to stop.
What happened. Chop does not know a loop's tempo; it knows only how many bars you say it lasts. By fitting the sample to 2 bars you told it "this audio is 2 bars long", and from now on it keeps it 2 bars long at any tempo. Try it: change the BPM while it plays. More in Tempo, bars and timing.
3. Chop it
The row of keys just above the waveform is the tool row.
- Click the small menu that reads
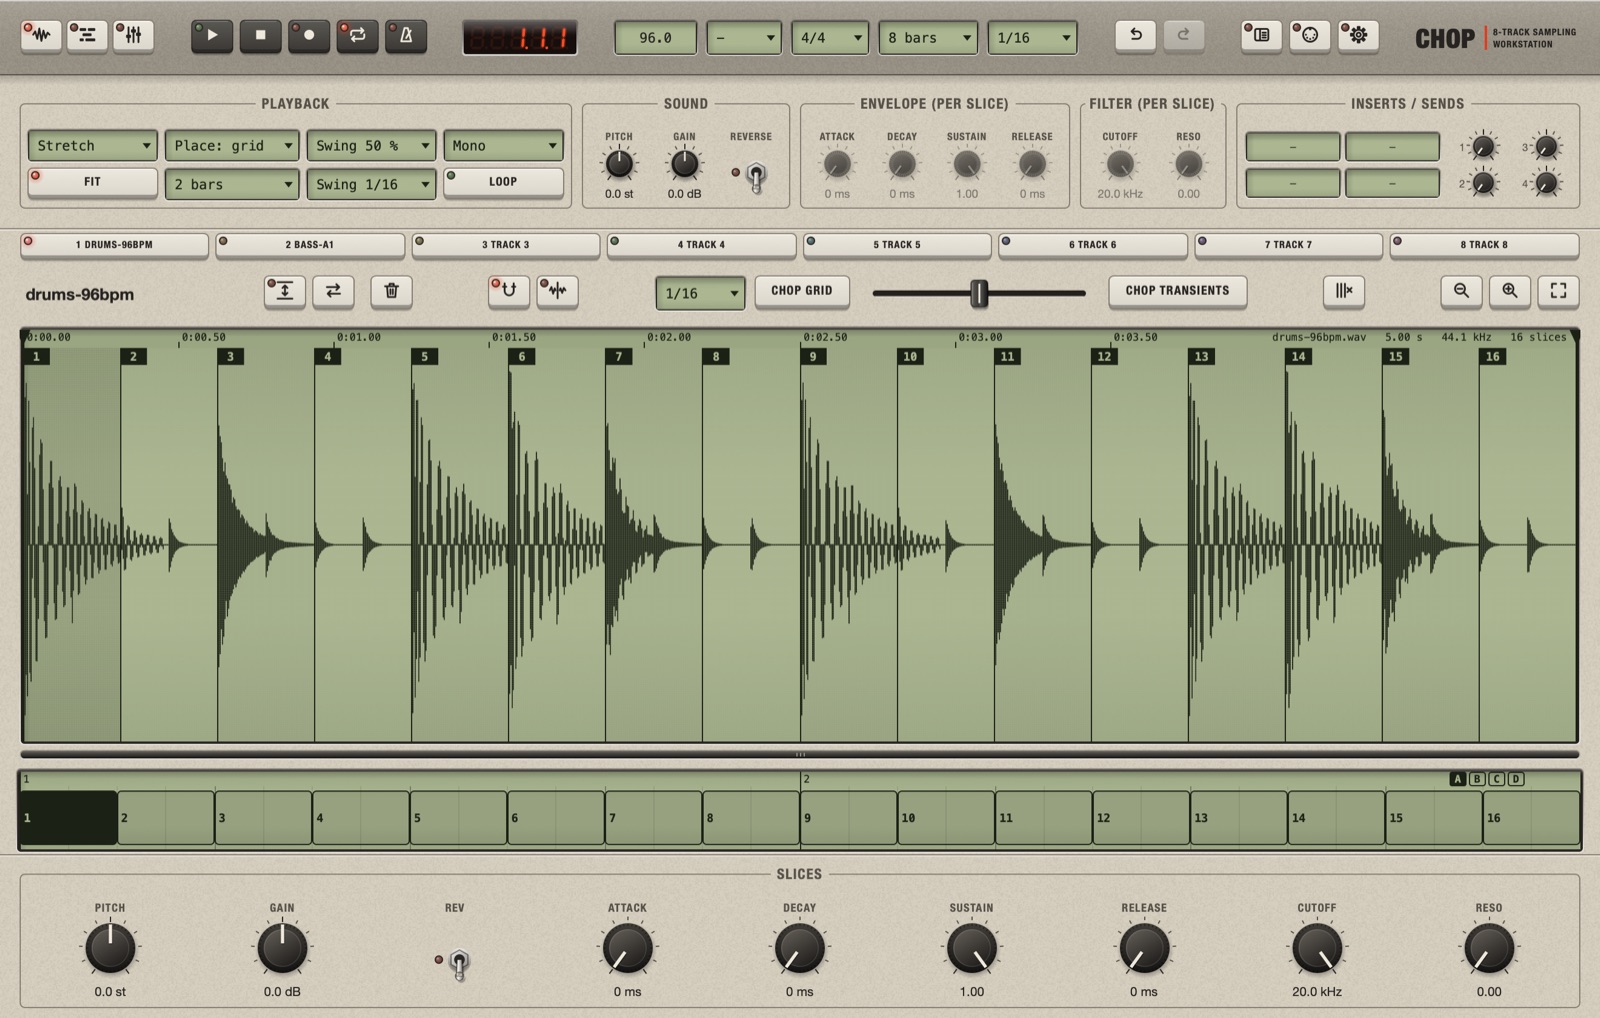
1/16and choose 1/8. - Click Chop grid, beside it. The loop is cut at every eighth note: a two-bar loop gets 16 numbered slices.
- Look at the strip under the waveform: it has one block for each slice, in the original order. The loop still sounds the same.
What happened. Nothing in the sound yet. A cut is only a marker: the loop is now sixteen pieces that happen to play in their original order. Each piece is a slice; each box under the waveform is a block, an instruction to play one slice at one place.
Now listen to the pieces:
- Click slice 1 in the waveform and press Space. Only that slice plays.
- Press Right to go to the next slice and Space again. Go through them to find the kick, the snare and the hi-hats.
- Tap Space twice quickly: the whole loop plays. One more tap stops it.
4. Make a new pattern
Press Return to let the loop play, and work on the blocks in the strip under the waveform. Every change is heard at once.
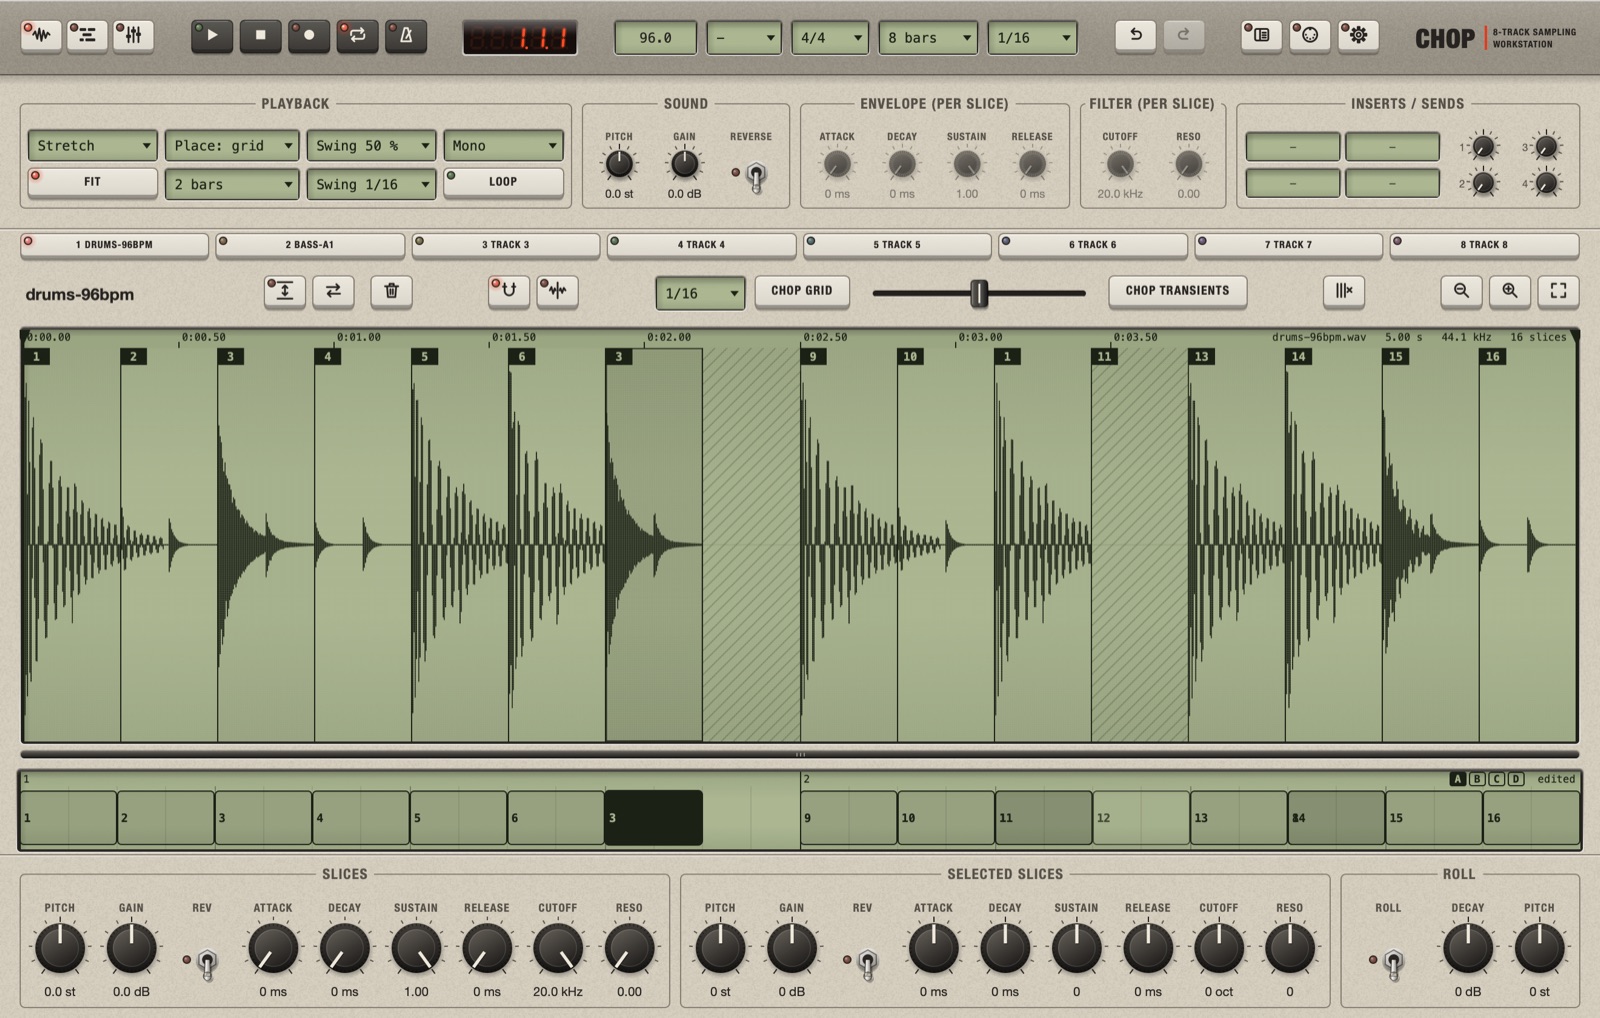
- Move: drag a snare block onto the place of a hi-hat. It covers what was there. The waveform above changes too: it always shows what plays.
- Copy: hold Alt and drag a block to another place.
- Mute: right-click a block and choose Mute, to leave a hole.
- Delete: click a block and press Delete.
What happened. You changed the instructions, not the audio. The file is untouched; the pattern now says to play the same pieces in a different order. This is the whole idea of Chop: see How Chop works.
The strip now reads edited at its right end. Made a mess? Cmd+Z takes back one step at a time, and a right-click on the strip > Reset to automatic sequence brings back the original order.
5. Shape a slice
Click a block. The panel at the bottom shows the knobs of its slice, in the Slices group.
- On a snare, turn Pitch down a few semitones.
- On a hi-hat, click the Rev switch: the slice plays backwards, and the waveform shows it mirrored.
- On a kick, turn Sustain down and set Decay to about 100 ms: the kick gets shorter.
Double-click a knob to put it back.
What happened. The knobs of the Slices group belong to the slice, not to the block. If you copied the snare in step 4, all its copies went down in pitch together. To change one copy only, use the Selected Slices group beside it: Shape the sound.
6. Add a second track
- Press 2, or click the tab of track 2.
- Drag your second sound onto the waveform area.
- If it is a single note or hit (a one-shot), turn Fit off in the Playback group, so that it plays at its original speed. Very short samples load this way by themselves.
- Press Return to hear it alone.
7. Build the song
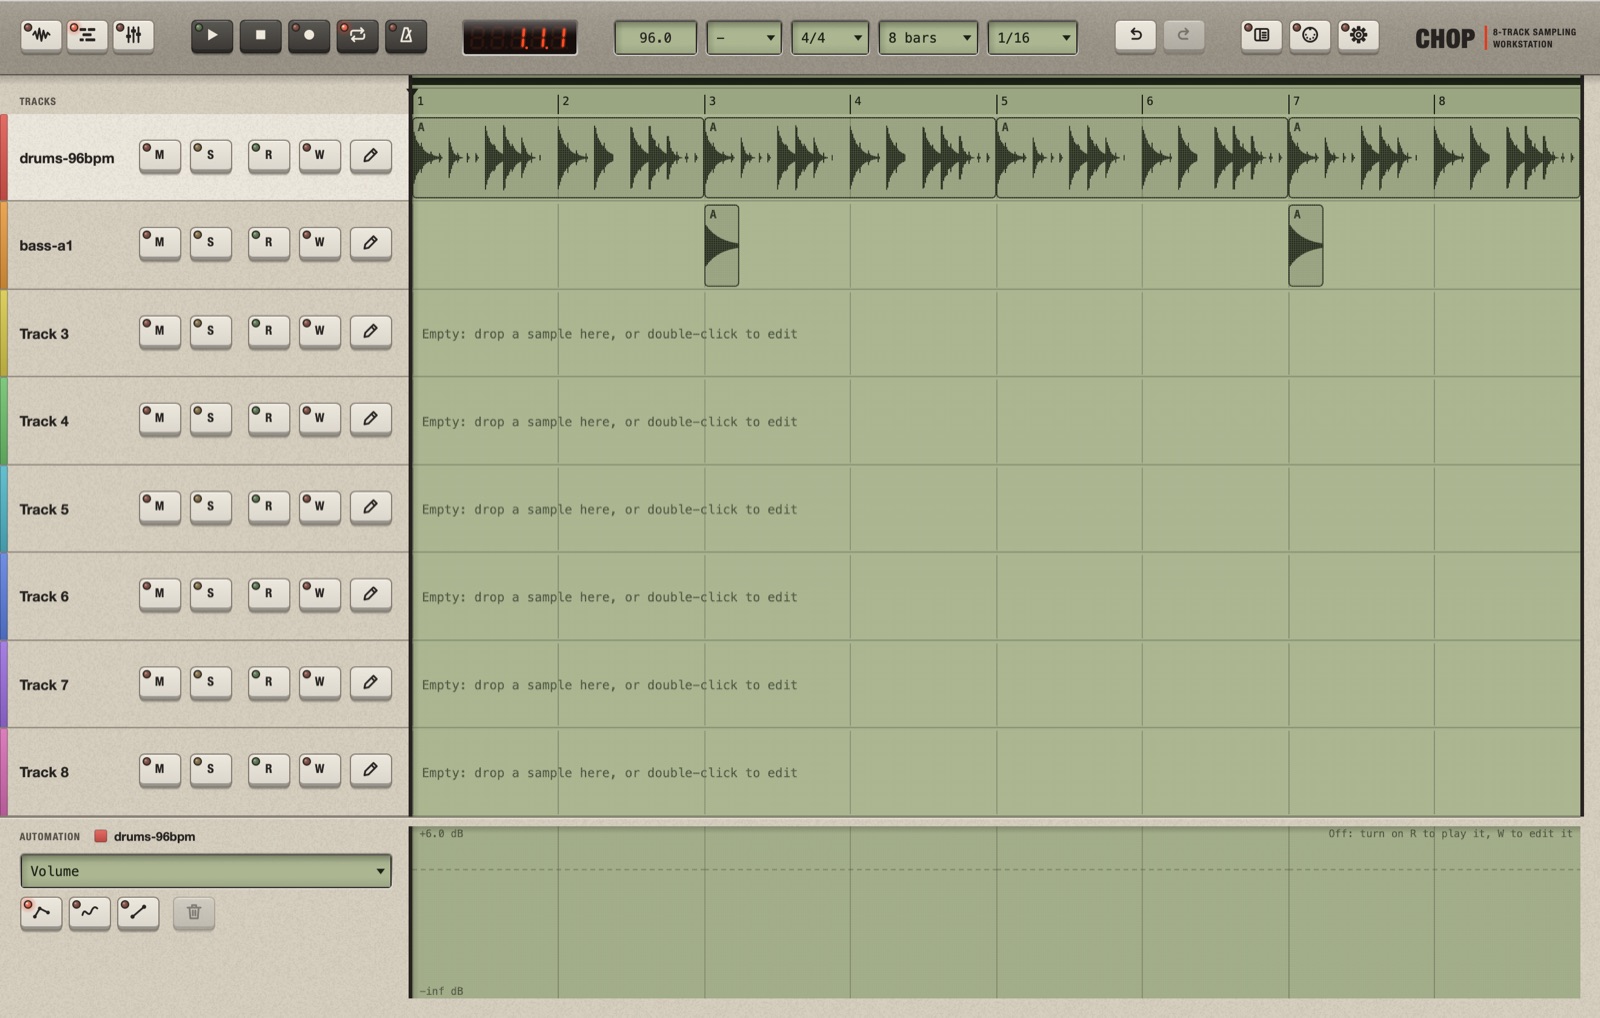
Press Cmd+2 for the Multitrack. Each track is a row. Each of your two tracks has one box at bar 1: a part, one play of the track's pattern.
- Click the drum part and press Cmd+D three times. A two-bar loop now fills the eight bars.
- Drag the part of track 2 to bar 3.
- Hold Alt and drag it to bar 7 to make a copy.
- Press Return. The song plays from bar 1 and repeats.
What happened. A part is not a copy of the audio: it is a place where the pattern plays. If you now go back to the Sample screen and change the drum pattern, all four parts change with it.
8. Mix
Press Cmd+3 for the Mixer. The song goes on playing.
- Drag the fader of each track until the two sit well together.
- Turn the pan knob under a fader to move a track left or right.
If you have VST3 effects, see Use VST3 effects to add a reverb.
9. Save and export
- Press Cmd+S and save the project in a new folder of its own.
- Choose File > Collect Samples: the two samples are copied into a
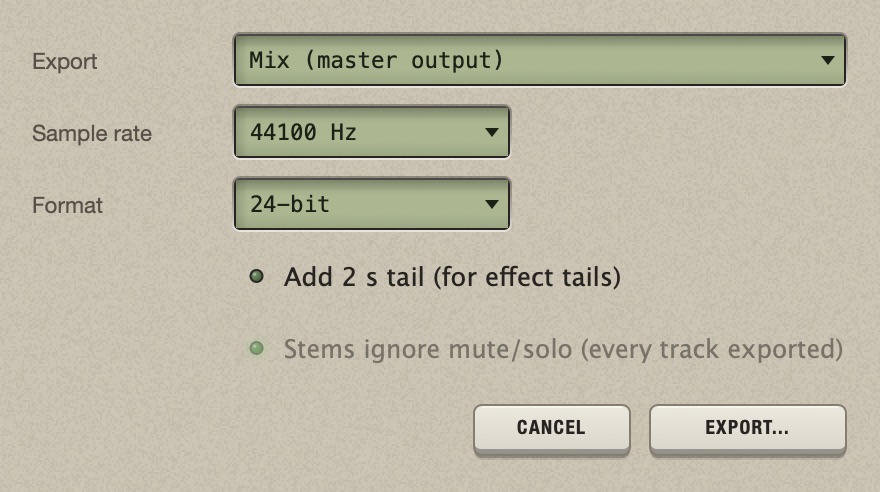
Samplesfolder beside the project. Press Cmd+S again. - Press Cmd+E, leave Mix (master output), click Export... and choose where to write the WAV file.
Where to go next
- Rolls and swing: stutters and shuffle.
- Variations A to D: a fill in the last bar without using another track.
- Automate a parameter: fade the second track in.
- Chop at the transients: cut where the drums hit instead of on the grid.