Sample screen
The Sample screen
The screen where one track is made: what each area is for and the order to work in.
The Sample screen (Cmd+1) shows one track at a time: the selected one. Everything a track plays is made here.
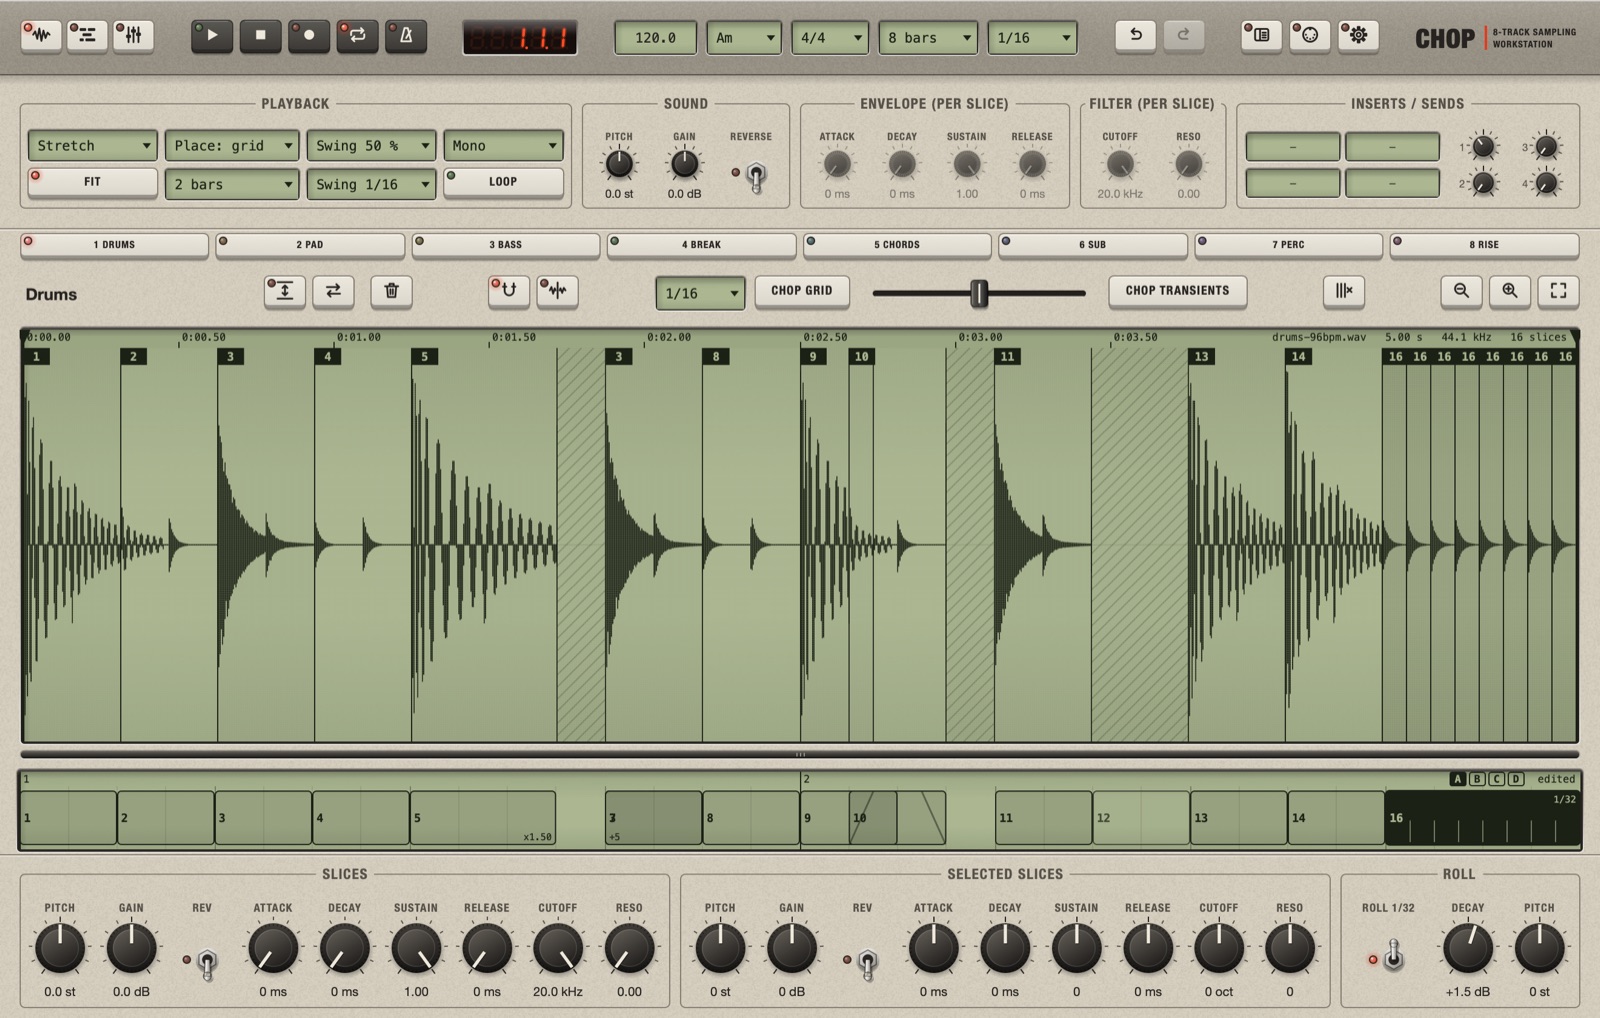
The six areas, from top to bottom
| Area | What is in it | Explained in |
|---|---|---|
| 1Top panel | The settings of the whole track, in five groups: Playback, Sound, Envelope, Filter, Inserts / Sends. | Tempo, bars and timing, Shape the sound, Use VST3 effects |
| 2Track tabs | Eight keys, one per track, with its number and name. The lit one is the track you see. | The eight tracks |
| 3Tool row | The track's name, then the keys that act on the sample and cut it. | Below |
| 4Waveform | The sample, with its numbered slices. | Chop a sample into slices |
| 5Lane of blocks | The track's pattern: one block each time a slice plays. The letters A B C D at its right. | Build a pattern, Variations A to D |
| 6Bottom panel | The knobs of what is selected: Slices, Selected Slices, Roll. | Shape the sound, Rolls and swing |
The order to work in
- Load a sample into the track. Load, import and record samples
- Set its length in bars, and how it follows the tempo. Tempo, bars and timing
- Chop it into slices. Chop a sample into slices
- Rearrange the blocks into a new pattern. Build a pattern
- Shape the sound of the track, of a slice or of a single block. Shape the sound
- Listen at every step. Play and listen
Nothing forces this order: you can chop again, change the bars or load another sample at any time.
The top panel
| Group | Controls |
|---|---|
| Playback | Top row: Timing (Stretch), Placement (Place: grid), Swing amount, Voices (Mono). Bottom row: Fit, Bars (2 bars), Swing step, Loop. They have no labels: each box shows its value, and the tooltip names it. |
| Sound | Pitch, Gain and the Reverse switch of the track. |
| Envelope, Filter | The track's envelope and low-pass filter. They are used only while the track has no slices; after that the titles read (per slice), the knobs are dimmed, and each slice has its own in the bottom panel. |
| Inserts / Sends | The track's four effect slots and four send knobs. They are the same as on the track's strip in the Mixer. |
If the window is too narrow for the five groups, the panel scrolls sideways.

The tool row
From left to right, in the order you use them:
| Control | What it does |
|---|---|
| Track name | Double-click it to rename the track. |
| Normalize, Reverse | Switches that act on the whole sample. Normalize or reverse |
| Clear the sample (bin) | Empties the track. |
| Snap to zero crossings (magnet) | Makes every cut land where the wave crosses zero, to avoid clicks. |
| Slice tool | While it is on, a click on the waveform cuts. |
| Note-value menu, Chop grid | Cuts the sample at every step of the value in the menu. |
| Slider, Chop transients | Cuts where the hits start; the slider sets how sensitive it is. |
| Clear slices | Removes every cut. |
| Zoom out, zoom in, zoom to fit | Zoom the waveform. |
In a narrow window the two chop keys read Grid and Transients, and the track name is hidden (it is still on its tab).

The waveform shows what plays, not the file
In most audio programs the waveform is a picture of the file. In Chop it is a picture of what the track plays: the pattern, drawn as audio. Right after loading or chopping the two are the same. As soon as you rearrange blocks, they are not.
- Move block 5 to the start of the bar, and the audio of slice 5 is drawn at the start of the waveform. The slice numbers on the flags are then out of order, and that is normal: they show which piece of the sample plays at each place.
- Copy a block, and the same piece of audio is drawn twice, with the same number.
- Stretch a block, pitch a slice, reverse it: the piece is drawn longer, shorter or mirrored, as it will sound.
- Mute or delete a block: its place is hatched, for silence.
This is why you can edit by eye and ear together: what you see from left to right is what you hear from start to end.
You never need to translate back to the file yourself. When you click, cut or trim in the waveform, Chop works out which piece of the sample is under the mouse and acts on that.
Read the waveform
- Numbered flags mark the start of each slice.
- Hatched areas are silence: a muted or deleted block, or a gap.
- REV marks a piece that plays backwards; it is drawn mirrored.
- The ruler at the top shows the time. At its right end is the sample's information: file name, length in seconds, sample rate, number of slices, and
ops:if the sample is normalized or reversed. - The two small triangles at the ends of the ruler are the part markers.
- A moving line is the playhead, while the track plays.
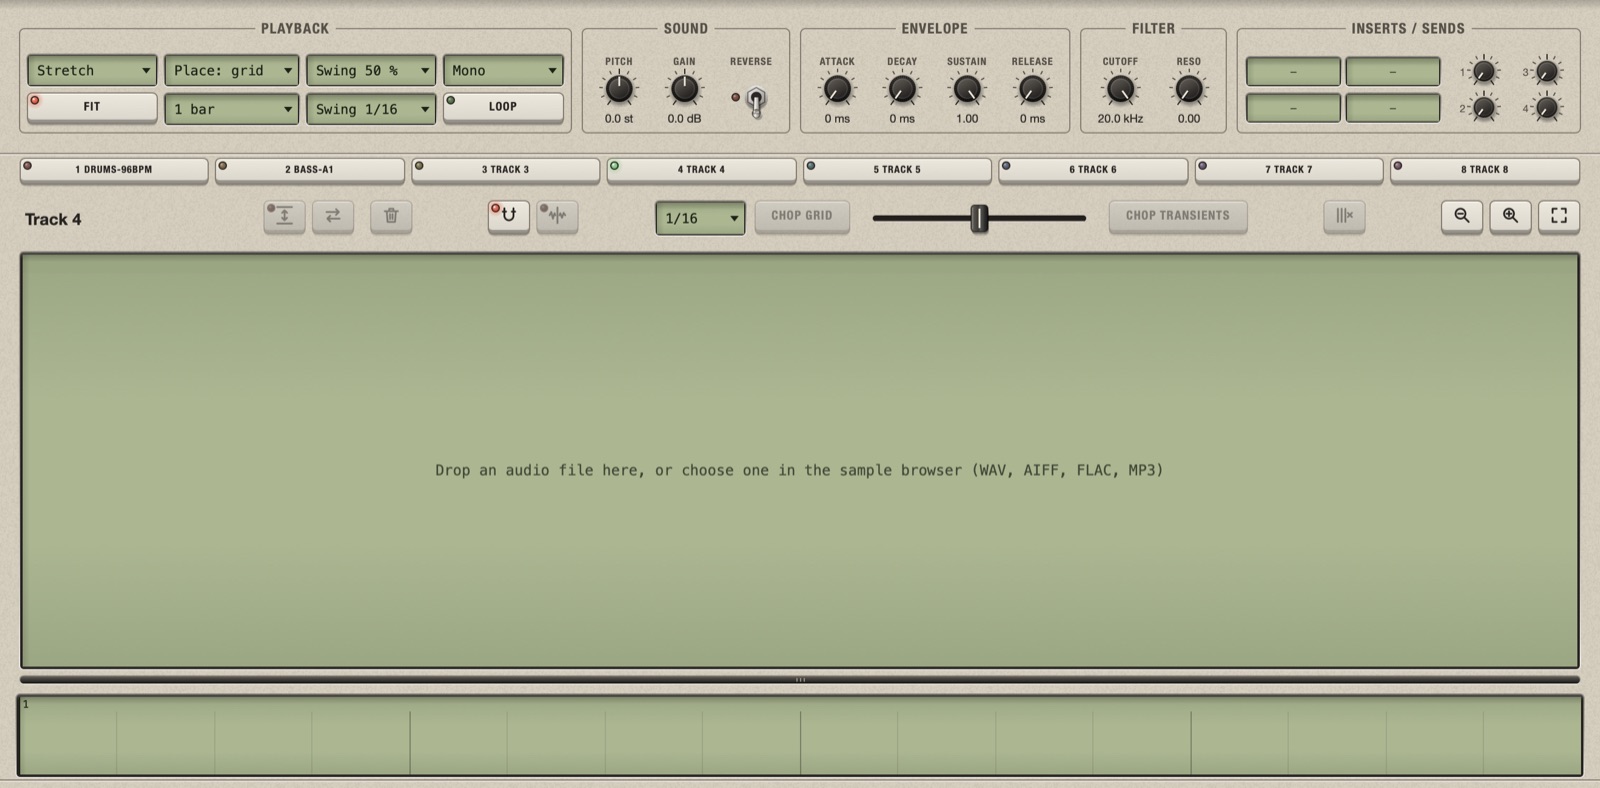
An empty track reads Drop an audio file here, or choose one in the sample browser. While a sample loads, the waveform reads Loading... and the track keeps playing what it had.
Zoom and scroll the waveform
- Zoom: the mouse wheel or a pinch on the trackpad, around the mouse; or the three zoom keys at the right of the tool row. Zoom to fit shows the whole sample again.
- Scroll: Shift+wheel, a sideways swipe, or the scrollbar under the waveform.
Read the lane of blocks

- The numbers at the top are the bars of the pattern.
- Each block carries the number of its slice. A selected block is black.
- A muted block is paler. A block that crossfades into its neighbour has slanted sides. A roll has a tick at each repeat.
+5(or a star) on a block means it has sound settings of its own.x1.50on a block means it was stretched to one and a half times its length.- The word edited at the right appears once the order is no longer the original one.
- Before you chop, the lane is empty and reads No slices: the whole region plays. Chop to edit the sequence. The sample plays from start to end.
The bottom panel
It shows the knobs of what you selected. With nothing selected it reads No slice selected.

- Slices: the sound of the selected slice, wherever it plays.
- Selected Slices and Roll: appear when a block is selected, and change only that block.
The difference between a slice and a block matters: see Select slices and blocks.