MIDI
Control Chop from a MIDI controller
Map knobs and faders with MIDI Learn, follow the selected track or slice, and set up encoders.
The idea: the controller is a set of spare hands
With a MIDI controller you can turn Chop's knobs and move its faders with your hands, while the music plays. Every knob, fader and switch can follow a controller.
You make the link yourself, one control at a time: "this knob on my controller moves that knob in Chop". Chop calls this a mapping, and MIDI Learn is the way to create one: you point at the control in Chop, move the knob on the controller, and they are linked. There are no ready-made layouts for particular controllers; any controller that has knobs or faders works.
What a mapping gives you that the mouse does not: two hands on several controls at once, moves in real time that can be recorded as automation, and no need to look at the screen.
MIDI in Chop moves controls. It never plays notes: a keyboard or pads cannot trigger slices. Slices play from the pattern.
Connect the controller
- Plug the controller in.
- Open the settings (Cmd+,, or the gear).
- Under MIDI inputs, switch your controller on.
- Press Esc.
Your controller must send CC messages (control change): this is what knobs and faders normally send.
Map a control
- Right-click a knob, a fader or a switch in Chop and choose MIDI Learn. A red banner in the toolbar names the control and waits.
- Move a knob or a fader on your controller.
They are now linked: the controller moves the control at once, also during playback. To cancel while Chop waits, click the red banner.
Mappings are saved with the project.

The right-click menu of a control
| MIDI Learn | Maps this control to the next controller you move. |
|---|---|
| MIDI Learn (selected track) / (selected slice) | Maps the control of whichever track or slice is selected. See the next section. |
| Remove MIDI mapping | Shown when the control is mapped, with the controller's number. |
| Reset to default | Puts the control back. |
| MIDI Mappings | Opens the page with every mapping. |
| Clear all MIDI mappings | Removes every mapping of the project. |
A control that cannot be mapped says Not MIDI-mappable.
Make a few knobs follow what is selected
A small controller has eight knobs; a project has hundreds of controls. Instead of mapping each one, map a knob to "the selected slice" or "the selected track":
- right-click a slice's knob (bottom panel, Slices) > MIDI Learn (selected slice);
- right-click a track's control > MIDI Learn (selected track).
An ordinary mapping is tied to one control: "knob 1 moves the pitch of slice 5 of track 1". A mapping to the selection is tied to a role: "knob 1 moves the pitch of whatever slice is selected". The second kind is what makes eight knobs enough for the whole Sample screen.
Now select another slice, and the same knob turns that slice's pitch. Select another track, and the same fader moves that track's volume.
- With several slices selected, the knob sets them all to the same value. With none selected it does nothing.
- These mappings stay when slices are deleted.
- An ordinary knob sends its position: the first time you move it after selecting something else, the control jumps to where the knob is. An endless encoder in a relative mode never jumps: see below.
See and edit every mapping
Click the MIDI key in the toolbar (the second of the three at the right), or choose File > MIDI Mappings. The page lists every control that can be mapped, in groups: Project, Selected track, Selected slice, Track 1 to 8 (each with its slices), Return 1 to 4, Master.
- Type in the search field to find a control:
track 3 cutoff,slice 2,volume. - Click Learn on a line and move a controller to map it from here. The key reads Cancel while Chop waits.
- A control mapped to several controllers has a line for each.
- A group named Other appears if the project has mappings to controls that do not exist any more. Remove them there.
A mapped control shows its source (CC number and channel) and these settings:
| Mode | What the controller sends: Absolute (an ordinary knob or fader), 14-bit, or one of three relative modes for endless encoders. |
|---|---|
| Min, Max | The part of the control's range the controller covers, in per cent. Set 20 and 80 to keep a knob away from the extremes. |
| Invert | Turns the direction round. |
| Curve | Linear, Log (fast at the start, fine at the top) or Exp (fine at the bottom). Volumes and sends also have Fader, frequencies and times Knob: the controller then moves like the control on screen. These are chosen for you when you learn. |
| Remove | Deletes the mapping. |
How Min, Max and Curve work together: the controller's travel, from one end to the other, is spread over the range from Min to Max, following the Curve.
Examples
- A filter knob that stays musical: Cutoff with Min 30 and Max 100. The knob can no longer close the filter completely, and its whole travel is spent on the useful range.
- A fine pitch control: Pitch with Min 40 and Max 60. The full turn of the knob now covers only about ±5 semitones instead of ±24.
- A knob that works backwards: tick Invert, so that turning up closes the filter.
Changes on this page can be undone.
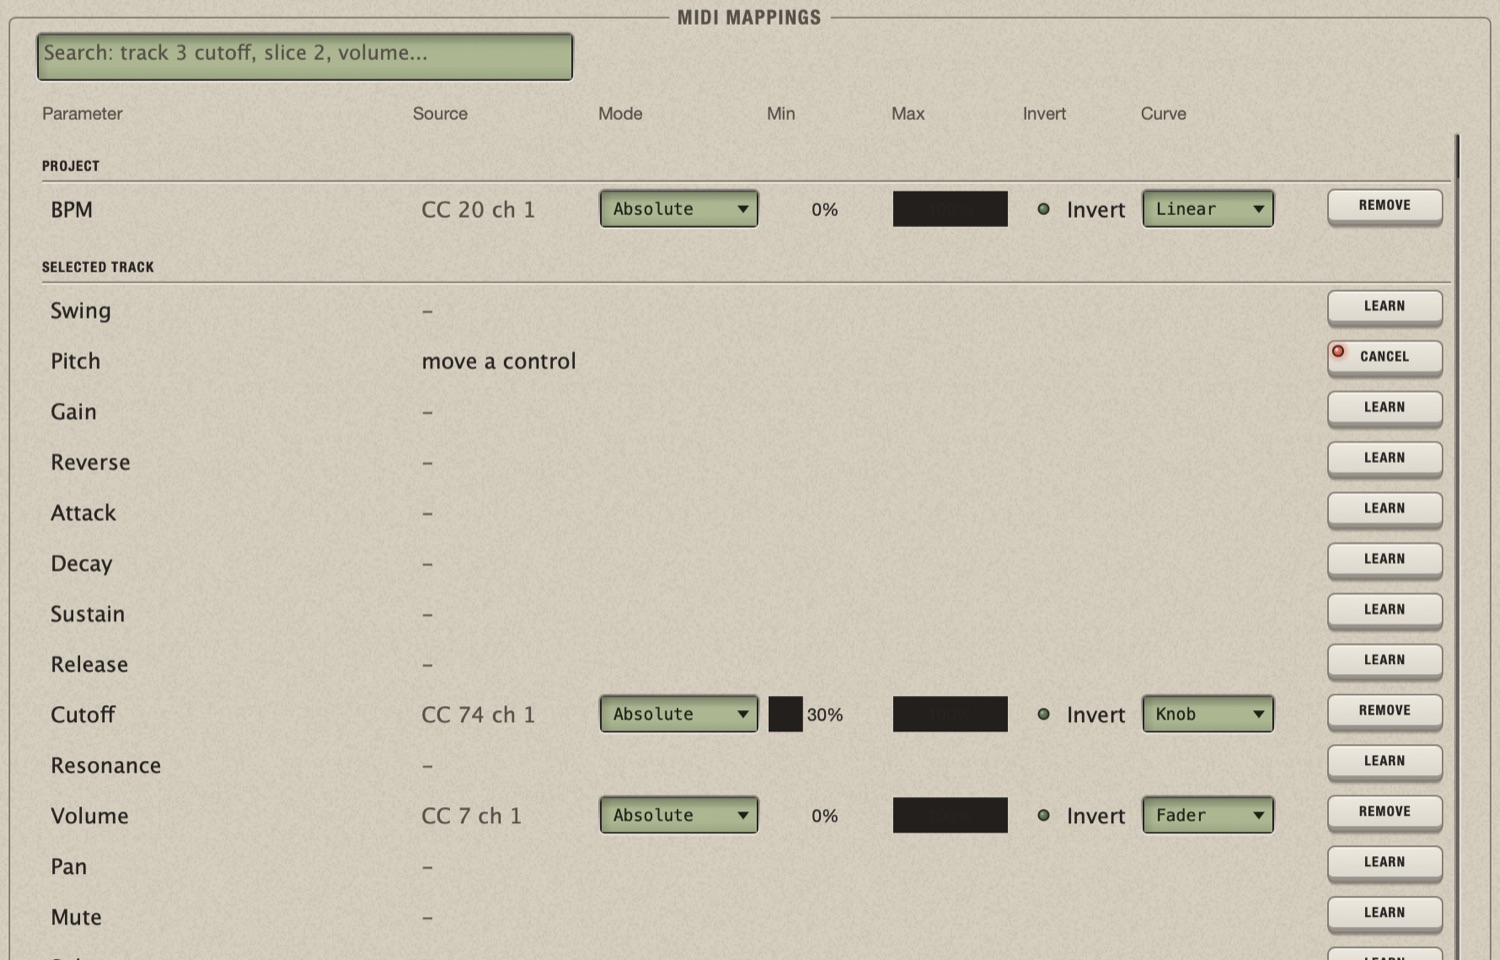
In the picture, the selected track's Volume is on CC 7 with the Fader curve, and its Cutoff on CC 74 with Min at 30 %.
Set up an endless encoder
An ordinary knob has two end stops and sends its position: "I am at 64 of 127". If the control in Chop is somewhere else (because you moved it with the mouse, or selected another slice), the control jumps to the knob's position as soon as you touch it.
An endless encoder (a knob with no end stops) can send steps instead: "one up", "two down". Chop then moves the control from where it is, so nothing ever jumps. This is the better kind of knob for mappings that follow the selection.
- Set the encoder to a relative mode on your controller, if it has the choice.
- Learn it as usual.
- On the MIDI Mappings page, set its Mode to the one your controller uses: Rel. 2's c., Rel. offset or Rel. sign.
Your controller's manual names its mode (two's complement, binary offset, signed bit). If you do not know it, try each: with the wrong one the control jumps, or moves in one direction only.
A switch mapped to an encoder goes on with a step up and off with a step down.
Use high-resolution (14-bit) controls
Some controllers send two CCs together for one fader, for finer steps (16384 instead of 128). Chop recognises them by itself when you learn: the Mode reads 14-bit. This works for CC numbers below 32.
Record your moves
With W on a track, the moves of a mapped controller are recorded as automation while the song plays. See Record automation from a MIDI controller.
What cannot be mapped
- The settings of a single block: the Selected Slices and Roll groups.
- An effect's on/off, and the knobs inside a plugin's window.
- The time signature, the project length and a track's Bars.
What happens to mappings when slices change
A mapping made for one particular slice is removed when that slice is deleted, or when you chop the sample again or load another one; undo brings it back. This way a new slice never takes over an old slice's knob by accident. Mappings to "the selected slice" are not affected.