Mixer screen
Mix the tracks
Levels, pan, mute and solo, the channel EQ, sends and returns, and the meters.
The Mixer (Cmd+3) has 13 strips: the eight tracks, four returns and the master. The song goes on playing when you come here from the Multitrack.

What is on a strip

| Part | What it is |
|---|---|
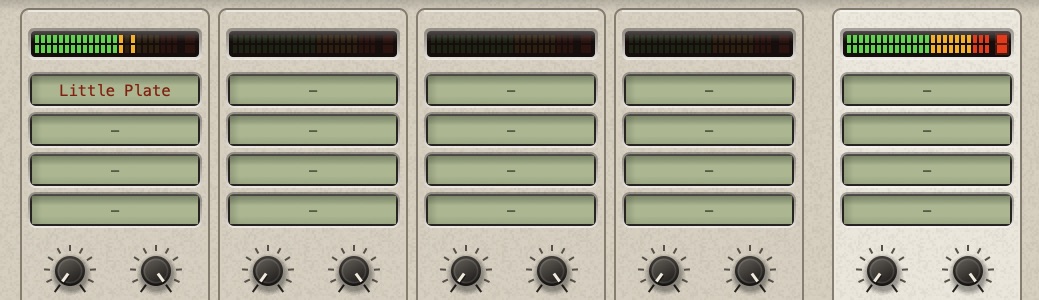
| 1Colour bar and meter | The track's colour; the level, left and right. |
| 2Four green slots | The insert effects. See Use VST3 effects. |
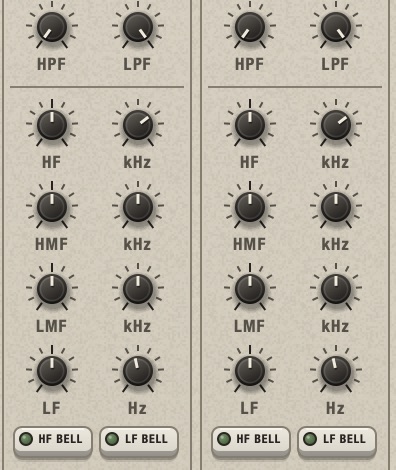
| 3EQ knobs | HPF, LPF, then four bands, each with gain and frequency, and the HF BELL and LF BELL keys. |
| 4Sends | Four knobs, 1 and 2 on the left, 3 and 4 on the right. |
| 5Fader | The volume, with its value in dB under it. |
| 6Pan knob | Between L and R. |
| 7M, S | Mute and solo. |
| 8Name | The track's number and name. |
A return has the same strip without sends and without solo. The master has the meter, the effect slots, the EQ and a red fader.
Set levels and pan
- Fader: from silence (∞ at the bottom) to +6 dB. 0 dB is three quarters of the way up, and most of the travel is around it, as on a mixing desk. The value in dB is under the fader.
- Pan: turn the knob towards L or R.
- Double-click a fader or a knob to put it back: 0 dB, centre.
Leaving room. Eight tracks at 0 dB add up to more than the output can take. Watch the master meter: if its red light comes on, the song clips at the output and distorts. Lower the track faders together, or the master fader. A mix whose master peaks in the amber, below the red, exports cleanly.
Mute and solo
- M silences the track. S lets you hear only the soloed tracks.
- The same two keys are on each track's row in the Multitrack.
- Returns can be muted.
- The effects of a muted track keep running, so reverb tails are not cut off when you unmute.
Mute and solo apply to the song. On the Sample screen, Play always lets you hear the track you are editing, at the level and pan it has here, through its effects, the returns and the master.
Read the meters
Each strip has two bars of lights at the top, left channel over right, showing the level after the fader.
- Green up to -12 dB, amber up to -3 dB, red above.
- One light stays for a moment on the highest recent peak.
- The red light at the end of a bar comes on when the signal reaches full level (clipping) and goes off by itself after three seconds.
The metronome and the browser's preview are not shown by the meters.
Use the channel EQ
Every strip has a simple EQ. It needs no switch: it is out while untouched, comes in as soon as you move a knob, and goes out again when every gain is at 0 and the two filters are off.
| Knobs | What it does | Range |
|---|---|---|
| HPF | Removes the lows below its frequency. | 16 to 350 Hz. Fully left: off. |
| LPF | Removes the highs above its frequency. | 3 to 22 kHz. Fully right: off. |
| HF, and the knob beside it | Boosts or cuts the highs. With HF BELL on, only around its frequency. | ±15 dB, 1.5 to 16 kHz |
| HMF, and the knob beside it | Boosts or cuts the high mids. | ±15 dB, 0.6 to 7 kHz |
| LMF, and the knob beside it | Boosts or cuts the low mids. | ±15 dB, 0.2 to 2.5 kHz |
| LF, and the knob beside it | Boosts or cuts the lows. With LF BELL on, only around its frequency. | ±15 dB, 30 to 450 Hz |
- In each row the left knob is the gain and the right one the frequency. A frequency alone changes nothing: turn the gain too.
- The value shows while you drag a knob.
- The EQ comes after the insert effects.
- The four gains of a track can be automated.
It is a support EQ, to clean up and balance. For more, load an EQ plugin in a slot.
Share a reverb or a delay with sends
There are two ways to put a reverb on a track. You can load it in one of the track's own slots: then it belongs to that track, and its wet/dry knob sets how much you hear. Or you can load it once on a return and send a little of several tracks to it.
The second way is what sends are for. A send is a knob that copies part of a track's sound to a return, without taking anything away from the track itself. The return holds the effect, and its fader sets how loud the effect is in the song. Send 1 feeds Return 1, send 2 Return 2, and so on.
Why share: all the tracks sit in the same space (one reverb, not eight), it costs one plugin instead of eight, and one fader turns the whole effect up or down.
- Load the effect in a slot of Return 1 (see Put an effect in a slot) and set it fully wet, with no dry signal.
- Turn up send 1 on every track that should have it.
- Set how loud the effect comes back with the return's fader.
- Sends 3 and 4 are after the fader (post-fader): what they send follows the track's volume. Turn the track down and its reverb goes down with it, so the balance between the dry sound and the effect stays the same. This is the usual choice for reverb and delay.
- Sends 1 and 2 are before the fader (pre-fader): what they send does not follow the track's volume. Pull the fader all the way down and you hear only the effect: a voice that is nothing but its reverb, a drum heard only through a delay.
Set the effect on the return fully wet (100 % effect, no dry signal). The dry sound already reaches the master through the track; if the return passes dry signal too, the track just gets louder.
The order of the signal
The order in which the sound passes through a strip explains what each control can and cannot affect.
- Effects come first, then the EQ. The EQ shapes the sound after your plugins. To equalise before a compressor or a distortion, put an EQ plugin in a slot above it.
- The fader comes after both. Moving a fader never changes how hard a track drives its effects. To do that, change the track's Gain.
- Mute silences the whole track: its way to the master and all four of its sends, also the two that leave before the fader. Its effects keep running in the background, so their tails are intact when you unmute.
- Everything ends in the master, whose effects and fader act on the whole song.
Rename a strip
Double-click the name of a track or a return, type and press Return (Esc cancels). The master cannot be renamed.
The same controls on the Sample screen
The Inserts / Sends group at the top right of the Sample screen has the selected track's four effect slots and four send knobs. They are the same controls as here: add an effect or open a send while you chop, and Play on the Sample screen goes through them.
In a wider or narrower window
The strips share the width of the window and the faders grow with its height. If the window is too narrow for 13 strips, the Mixer scrolls sideways.